Tuesday, August 30, 2011

...aaaaaaaand....we're back :)

Power is restored after almost 2 days without it and I am so thankful. It is quite hard to keep kids entertained indoors these days without allowing them access to their rooms (for fear of the tree out front coming down on their second story bedroom), video games, or television. Lets just say there were lots of board games (which usually ended in pieces being flung at one another when they weren't getting along and lots of tempers flaring) and books.

A big tree fell down in the back yard by the power lines that run to the mill down the street, killing power to our little neighborhood, and ruining my morning cup of coffee. I must say thanks to the little country store on the corner, however, who provided me coffee thanks to their generator :) Couldn't have weathered the storm without them! When the tree company finally removed the culprit, they showed us what they found at the base of the tree...
...a beaver had chewed apart the base, making it easy for Irene to topple the tree like a measly domino. Dam beavers!!!!! (Hahahaha...my storm humor...I know, I know...I'll stop now.)

That last one is a pic of half of the trees and limbs affected by the storm. There are still more to be taken down, but hubby's chainsaw chain BROKE while attacking the stand of them that seemed to be the hardest hit.
This project was featured over on the Crafter's Companion Blog on Monday, and I thought I'd share it here for those of you who may not be a follower or missed it. (I know I did, hard to sign on to Blogger when there's no power or internet!)

For this beauty, I used a card base and rub on from the Fairyopolis cardmaking kit and the Birthday Girl Humphrey stamp set. Isn't she so cute? I decided to paper piece her rather than color her, and used Distress Stickles to accent her dress. A nice KI ribbon completes the simply sweet card.

Stay tuned for 2 more posts this morning, lots of DT stuff that I wasn't able to post about or am late posting about...school has started, so it's been a matter of getting back in the swing of the schedule. Hubby's hours were recently cut down to an amount I don't even want to share, so preschool is out of the question for now. Good thing I used to teach in a preschool pre-Patryk, he's loving being homeschooled (thus far...it's only day 3.) Hope you all are having a great day thus far! More posts, and some crafty time for this lady :)

Wednesday, August 17, 2011

Altered Mirror and *FINALLY* The Candy Picture :)

Well, I bet that got your attention! At the end of this post will be a photo of the candy I'm offering (although it's hard to see it all, but surprises are the best, right?) Lots of pics in this post, but it's worth it to get through until the end :)

So I got this mirror at a yard sale at the beginning of the summer for *free* (awesome score) and knew I wanted to alter it. I liked the gingham and flowers, but it just wasn't really my style. I finally had the chance to dive in, and decided this was a project made for my daughter Andraia, 11 years old and beginning her years in middle school. I wanted her to have something special to make her feel good, and this did the trick :)

I started by taking my MME Lime Twist 6X6 paper pad and selecting the papers I intended to use. I used Helmar 450 to adhere the paper (and every other element of the mirror) to the frame.

A little closer to completion...
....and almost done. I put some Imaginisce flowers with MM pewter square deco brads in the center on the corners of the mirror (and Andraia says that's her favorite part of the mirror.) :)
A close up of a flower....I love the pink colors of these :)
I felt it needed more, so I added some strips of pink dotted ribbon and her name framed by some bling (of course! What middle school girl doesn't like bling?)


Hope you like it! I had fun making it, and she absolutely LOVES it. I don't even think "love" describes how she feels. Love my girl!

So here's what you've been waiting for, right? Screw the mirror, show me the giveaway! Here it is, inside the Scrapbook Circle pizza box (I love reusing, and these boxes are great for 12X12 paper!) You can't see the pack of 12X12s from my stash, or the 4X6 photo mat papers (lots of great designs!) You can see the stack of 6X6 (Nikki Sivils Tree Love on the top!), ribbon, buttons, rubons, alpha stickers, and border stickers. There are also some cute punched butterflies :)

Find the post **here** to get the info on how to enter (and how to maximize your chances to win!)

Hope you all have a great night...hubby is about to leave for work, and I'm ready for BED. I leave you with a horrible quality cell phone photo of my son in his tuxedo...he's the ring bearer in a September wedding, and went for a fitting today. Hubby shot this pic of him for me :) He's growing up so fast...I can't believe he'll be 4 in a few short months!

Sunday, August 14, 2011

Stuff 2 Scrap August Challenge & A Card

Quick post before I collapse in bed....it was such a lazy day, which allowed me time to make this layout. Can't wait to have more days such as this! (**so lazy I started this post after midnight last night and gave up, adding pics this morning! Man was I tired!**)

I decided to play along at Stuff 2 Scrap, my favorite source for innovative chipboard, and this month they want to see what you can make using the color scheme they provide.

  • SUGAR RUSH PINK
  • TROPICAL WATER BLUE
  • SPAGHETTI WESTERN RED
  • PANDA EYES BLACK
  • SOFT SERVE WHITE

I am finally to point in Andraia's album that Patryk is born! Yay! (Took me long enough...) here's my take on the color palette, a photo of Andraia holding Patryk the day after he was born :) :
I used papers from a kit I just received from We Scrap, a great kit company on Etsy. I used the yummy Crate Paper Pink Plum papers and a journal sticker along with the Pink Paislee Ambrose alpha in coconut contained in the kit (which I can't wait to play with later today!) I added piece of MME Lime Twist for a pop of turquoise, and love how well it goes with the other papers!
On the Crate Paper journal sticker, I used October Afternoon Mini Market alpha stickers, a white bracket sticker from the PP alpha, a pretty shaped black and white journal spot from the We Scrap Kit, and finished it off with a chipboard heart from Stuff 2 Scrap which I painted over (Eco Green Crafts white acrylic paint), doodled on with black pen, and finally decided to adhere the red twine around it using my Helmar 450. That little square/circle embellie is just the patterned papers punched and layered.
Look at that chipboard element, the cluster of squares, also from Stuff 2 Scrap, which I also painted white and adhered with Helmar 450. I love how invisible the glue is when it dries! I penstitched the alpha stickers because they just looked too plain, and framed the left side of the photo with black and white decorative masking tape.
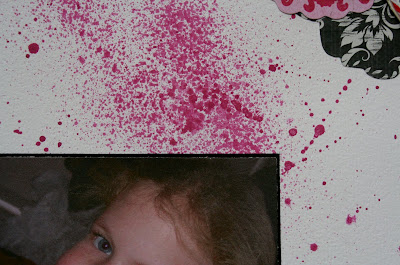
I am sure you all know by now I make my own mist sprays, this one is made with EcoGreen Crafts acrylic paint in raspberry, water, and Micropearl Pearl Ex powder.

Here's the card I promised to show off as well, made for my future sister-in-law, presented at her bridal shower on Saturday. There was scrapbooking going on at the shower, so of course I was in heaven :)

I used my Ultimate Crafter's Companion to make the envelope out of tan cardstock, using pearls, some Prima flowers, and a random journal spot on the front with my Basic Grey alpha stickers for her name.

Webster's Pages papers, random lace and trim accented with Diamond Stickles, Tim Holtz "destiny" charm, blue twine, DCWV Marriage vellum quote stack, Cricut Heritage flourish accented with Diamond Stickles (love how the black paper made the Stickles appear gold!)

That's all for now...I did pull all the stuff for my giveaway out to photograph, so stay tuned for those to be posted a bit later. I have to take Rileigh to the doctor as her finger is infected...she bites her nails, and bit one so bad it got infected :( I haven't seen her biting her nails since we discovered the infection on Friday, so I think she's learned her lesson :) We've been trying to soak it and my ER nurse mother has come by to poke at it with a needle to help drain it, but it isn't getting any better...time for antibiotics!

xoxo

Saturday, August 13, 2011

A Fairyopolis weekend

My mom recently had a birthday (the 10th to be exact), and I made this card for her (and thankfully can share it as I was finally able to present it to her yesterday...I made her a delicious birthday lasagna followed by chocolate truffle cake. YUM.) The Fairyopolis Complete Cardmaking Kit makes it all possible, and in a matter of minutes, too!

I started by decoupaging the lovely fairy, and the kit makes it super easy to achieve this layered beauty...that and the Collal decoupage glue. Perfect for making dimension and keeping everything where it is intended to be! While she was drying, I selected one of the card bases contained in the kit and chose some border stickers, one of which I covered in Stickles. I felt it was missing something still, so I cut the circle from another card base. Perfect! (All except for my cutting skills...that's ok, Stickles to the rescue, hiding my mistakes.) Some rub ons seemed like a good addition, and a pretty Stickle heart.
I used the stylus contained in my Ultimate Tool to curl the banner the fairy is "holding", attaching it with more Collal glue...and adding more stickles! The sentiment is a rub on from the kit. See, it really is the COMPLETE cardmaking kit! Of coures, I had to add some sparkle to those fairy wings, too!

That's about it for today...unfortunately, I can't craft at ALL. Between a bridal shower and a housewarming party, I'm being pulled in too many directions for crafting. Watch for a post tomorrow, though, showing off not only the card I made for the new bride, but a picture of my CANDY! Yay!!! It will be a mystery no more :)

Have you entered the current challenge over at the Crafter's Companion Challenge Blog? You should! Always great prizes to play for each month :)

Hope you all have a great day!

Thursday, August 11, 2011

100 Followers Extravaganza!

Good morning!

I had promised this in another post of mine, and here it is...CANDY TIME!

Picture to come later, I just wanted to be sure I had it up and ready. Rileigh is having a sleepover tonight, so I have quite a bit to do to prepare.

With the Crafter's Companion Envelobox Creator giveaway I recently had, I noticed my followers have exceeded 100!!!! Wowzers! I am so thankful that you all decided to follow along, I'm offering up a BIG prize pack. What's inside? Well, until you can see a picture, you'll just have to drool over my description. It is so big, I am putting it inside a Scrapbook Circle kit box (and if you have never received a kit from Scrapbook Circle, I'll tell you...it's a little adorable pizza box, just perfect for 12X12 paper!) This should save me a bit on shipping it in a big Priority box, allowing me to stuff it full of goodies!

There will be a ton of 12X12 taken from my stash, a couple of clear acrylic stamps, a hodge podge of die cuts and random bits, ribbons, stickers....it's going to be great. It's all been set aside from my last big overhaul of my craft room, and there has been more added since then! If by some small chance my followers exceed 200 by the time this contest ends (you all know people who would want to sign up, so of course I'm sure this is a possibility!) I will add a **2nd prize pack**!!!!!!!!!!!

What do you have to do to win? Obviously, be a follower. You should have that part under control already ;) Blog about my candy, thereby increasing my followers :) Let your friends know on Facebook if you don't have a blog. You must share this giveaway with others! Then, comment on THIS POST with the LINK to your blog post or Facebook post, showing me you have followed the rules.

For an additional entry, follow me on Facebook. Leave a separate comment telling me you have done this.

For yet another entry, become a follower of the Crafter's Companion Info blog, and the Crafter's Companion Challenge blog. Leave a separate comment for BOTH and that's now 2 additional entries!

Want another chance to win? Well, become a follower of the XOXO Challenge blog, too! Yet again, another separate comment.

I will be using each comment in random.org, so you MUST leave separate comments (random.org assigns numbers to each comment. I will NOT separate them out myself, so it's up to you to comment properly.) Obviously, you do not need to do all of these things if you don't want to, just if you want your name in the hat multiple times :)

That's all for now, hope you all have an awesome day. You may enter until midnight, September 16th, I will draw a winner on the 17th (my dad's birthday!) Good luck!

xoxo

Monday, August 8, 2011

help me....

WIN SOME HELMAR ZAPDOTS!

They are having a contest, and if anyone out there wants to help a sista out, head over to the Helmar Facebook page. Like them. then say, "Khristen Foss loves Helmar and sent me over to say hi." That's it! (And you'll love "liking" them too...they have an amazing DT with great inspiration!)

Thank you in advance for clicking the link and helping me win some Zapdots :) *muah* xxx

Playing along with Helmar

I got it! My package arrived today, and inside the box: the one and only Helmar 450. My first time playing with it, and it really was awesome!

I pulled out the current Helmar sketch and set out to work with the my new obsession, the Summer Star kit from Scraptastic Club.

The sketch:

My interpretation:
I started with this great blue cardstock which I sprayed with my homemade mist made with Pearl Ex Micropearl powder, glue, and water. You can't see it well in this pic, but some of the close ups showcase the shimmer :) (That's why the paper is curled...I just couldn't wait to take pics and show it off here on the blog, I had no time to let it rest in an album to straighten it out!)
All of the stuff except the adhesive and white gel pen came in the kit. I took the 450 and glued the green twine around each paper rectangle. It was amazing how fast it dried, and how clear it was when it was dry! I need to play with it a little more to get used to what comes out when you squeeze it...it was still super easy to get the twine to stay in place without waiting a half hour while you hold it until it dries. This stuff really is amazing as they say it is...even around the corners, it held strong.

I doodled the white circles, adding some red pen "stitches." Doodled a red star inside the chipboard star.
I just love the way the journaling is here! It really makes the layout in my opinion.
I added more twine around the big chipboard star, completing it with a punched star from the kit with a twine bow in the center.

With the kit and the 450, this page came together in no time flat (40 minutes to be exact.) You just HAVE to go play with this sketch at the Helmar blog!

Dinner time, hope to post another later as I just want to continue playing :) Hope you are all having a great evening xx

We have a winner of the Envelobox!

Good Monday morning, I love starting the day off by posting good news and winners :)

I would like to thank everyone who joined in on the fun and started following the Crafter's Companion blogs, I hope to see all of you entering your gorgeous creations in our challenge now, no excuses ;)

Ok, ok...on to the winner. The winner, chosen by the random.org thingy in my sidebar, is none other than:

Pinky said...

What a fun and totally useful tool! Thanks for the chance! How generous of Crafters Companion!
I followed! :)

Sunday, August 7, 2011

A quick post before bed

I got into the craft room earlier today to play with the August kit from Scraptastic Club, the Summer Star kit. I loved the bright, fun patterns of the wonderful MME Lime Twist line, and all of the fun stars and pretty twine. (The white foam Thickers were a nice touch, too!) I just love how tearing into a new kit is one of those sweet little moments, a highly inspirational moment, for sure!

I started with CLP's Challenge #39, a great sketch that just screamed out to me, telling me it was perfect for my photo and papers.

Here's the sketch:
I decided to turn the sketch to the right, and got to work using this pic of Rileigh waaay back in kindergarten. It was so quick and easy, just a little cutting and layering of patterned papers on top of the kraft background (in the kit, baby!) Boom. Layout.
Then to work on embellishments and the title...look at those Thickers. I thought of altering them, but thought the clean, white title was more impressive than anything I could have done. Sometimes less is more, right? Sometimes. Not often...HAHA That cluster of stars are chipboard stars (in the kit) inked up with my SEI chalkbox ink pad, on top of which I placed some of the buttons(also in the kit.) It's hard to tell from these pics, but after gluing one of the stars onto a Lime Twish journal box die cut, I raised up the second to rest on the first, and then used a double layer of foam squares (Crafter's Companion, of course!) on the third star. It looks really neat up close :) I wrote on one of the paper strips with white gel pen, and then doodled some stars underneath. Can't live without that white gel pen!
I used the red twine included in the kit on the pic :) Love twine (I know, I know, who *doesn't* love twine right now?!)
Finished it off with these three stars.

Love this kit, and there is SOOO much stuff to play with! It made it so easy to complete this layout in the small amount of time I had to work with, which is a big plus in my book. Glad I joined the club as a subscriber, can't wait for next month's kit!!

Until tomorrow, have a great night! Maybe I can get some sleep...

Dream Valley Challenge #13: Distressing

Good morning! It's that time again, Dream Valley Challenge time! This time around, we want you to distress your project. There are numerous ways to accomplish this, whether with distress ink or a pair of scissors, sandpaper or water. Show us how you prefer to distress for a chance to win:

AND $10.00 to spend at


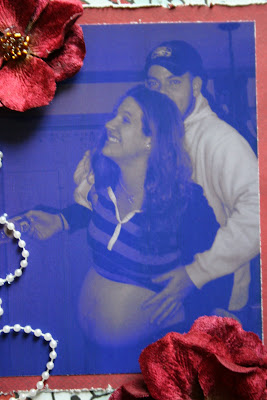
Here's my layout, a great shot of my husband forcing me to show off my big ol' preggy belly. I wish I had more belly shots, but I guess with the third child, time just slips away and before you know it, your belly is back to normal! At least I have this great shot. Do you notice anything about the picture? It's more of a blue-black-and-white...can you guess why? Well, I ran out of color ink while printing it. Rather than toss it, I decided to choose papers that would showcase its unusual coloring. (And now I wait for new ink to arrive in the mail...it can't come quickly enough!)
See what I mean? Isn't that just the best picture? The mat is distressed with a little something I picked up ages ago (we're talkin' 10 years or so ago), my Heidi Swapp edge distresser. It's a cute little pink circle with a razor blade inside, saving your fingers from being trashed by your scissors :)
A dainty strand of pearls always completes a page perfectly :)
The giant flowers are Petaloo and the smaller one is Prima with another Prima flower in the center. Journaling reads: 9 months pregnant. Forced into exposing my enormous belly. Not cool. November 2007.
Scenic Route alpha traced with gel pen. The whole layout was inked around the edges as well. The papers themselves, Fancypants of course, had a distressed look to them so I thought they would be perfect.

That's it for me, I have a lot to do today. Had over to Dream Valley Challenges to see what the rest of our fabulous team has created, most using adorable Digi Doodle Shop images, and enter your distressed project for a chance to win one of our great prizes! You have 2 weeks, so get distressing!

Thursday, August 4, 2011

Lucky me, more scrapping time!

Good afternoon! I had another chance to sneak into the craft room today…little man doesn’t feel well. He is complaining of an upset tummy, and although he hasn’t gotten sick or anything like that, he just isn’t himself so I know something is up.

Rather than sit around and do nothing (and of course after playing around with Pintrest and refreshing my blog’s look…do you like?) I got up into the craft room and worked on Rileigh’s album a little more. I’m only 4 years behind *gasp* haha

I saved this post card that Rileigh received from her preschool teacher during the summer before kindergarten started up, and I recall the look of delight on her face when I told her she had mail. She could read very well before even entering preschool, so she was abe to read the note from her teacher. It’s exciting to get mail!

IMG_1266

I began by misting the background page with my homemade glimmer mist, a combo of Eco Crafts raspberry acrylic paint, Pearl Ex powder, and water. I layered some BG Euphoria paper and added the postcard over it. I thought the colors of this paper line matched the post card quite nicely, don’t you think? (I blurred out the address even though we don’t live there anymore, you just never know…)

IMG_1268

A strip of BG with some MME Laundry Line crocheted flowers/Prima flower and BG glazed brads = great place to put the title! “teacher” is MM Flutter Glitter Bling Alphas in green. At the last minute I ended up sticking this gorgeous black washi tape, and love it.

IMG_1269

Letters in the journaling are from the Girls Paperie jubilee sticker pack (which is just awesome.)

IMG_1271

I love doodling :)

IMG_1272

Random lace ribbon with washi tape on top. More Girls Paperie sticker words and doodling!

IMG_1273IMG_1274

There you have it! Who says only photos should be featured in an album?!