Good morning! I hope your morning has started out ok. I'm probably hard at work (because I scheduled this post last night, glass of wine in hand...in fact, I drank my wine out of the glass that came contained in this box!):
I decided the box was perfect for a gift package, most likely for another wine glass to give to a friend (and if you know me, you know I save just about every package in order to alter it in some way to reuse!) I had a great idea for this one, involving some amazing acrylic flowers I picked up at CKC - Manchester, my Spectrum Noir pens, and one of Crafter's Companion's new Camden Town stamp sets. Follow along, and you can create a similar gift box. You can alter this project to suit any shape box, square or cylinder. The process is essentially the same! Ok, here we go, this is a photo-heavy post so I hope you have your coffee handy! :)
1. Start by choosing your patterned paper. I chose this pretty sheet from Studio Calico's Snippets collection. Love the muted rainbow colors!
2. Place your gift box on the paper, and make a pencil mark to cut it to size (you can measure it as well, I just did it this way to save a bit of time :) ) Cut it to size with a paper trimmer.
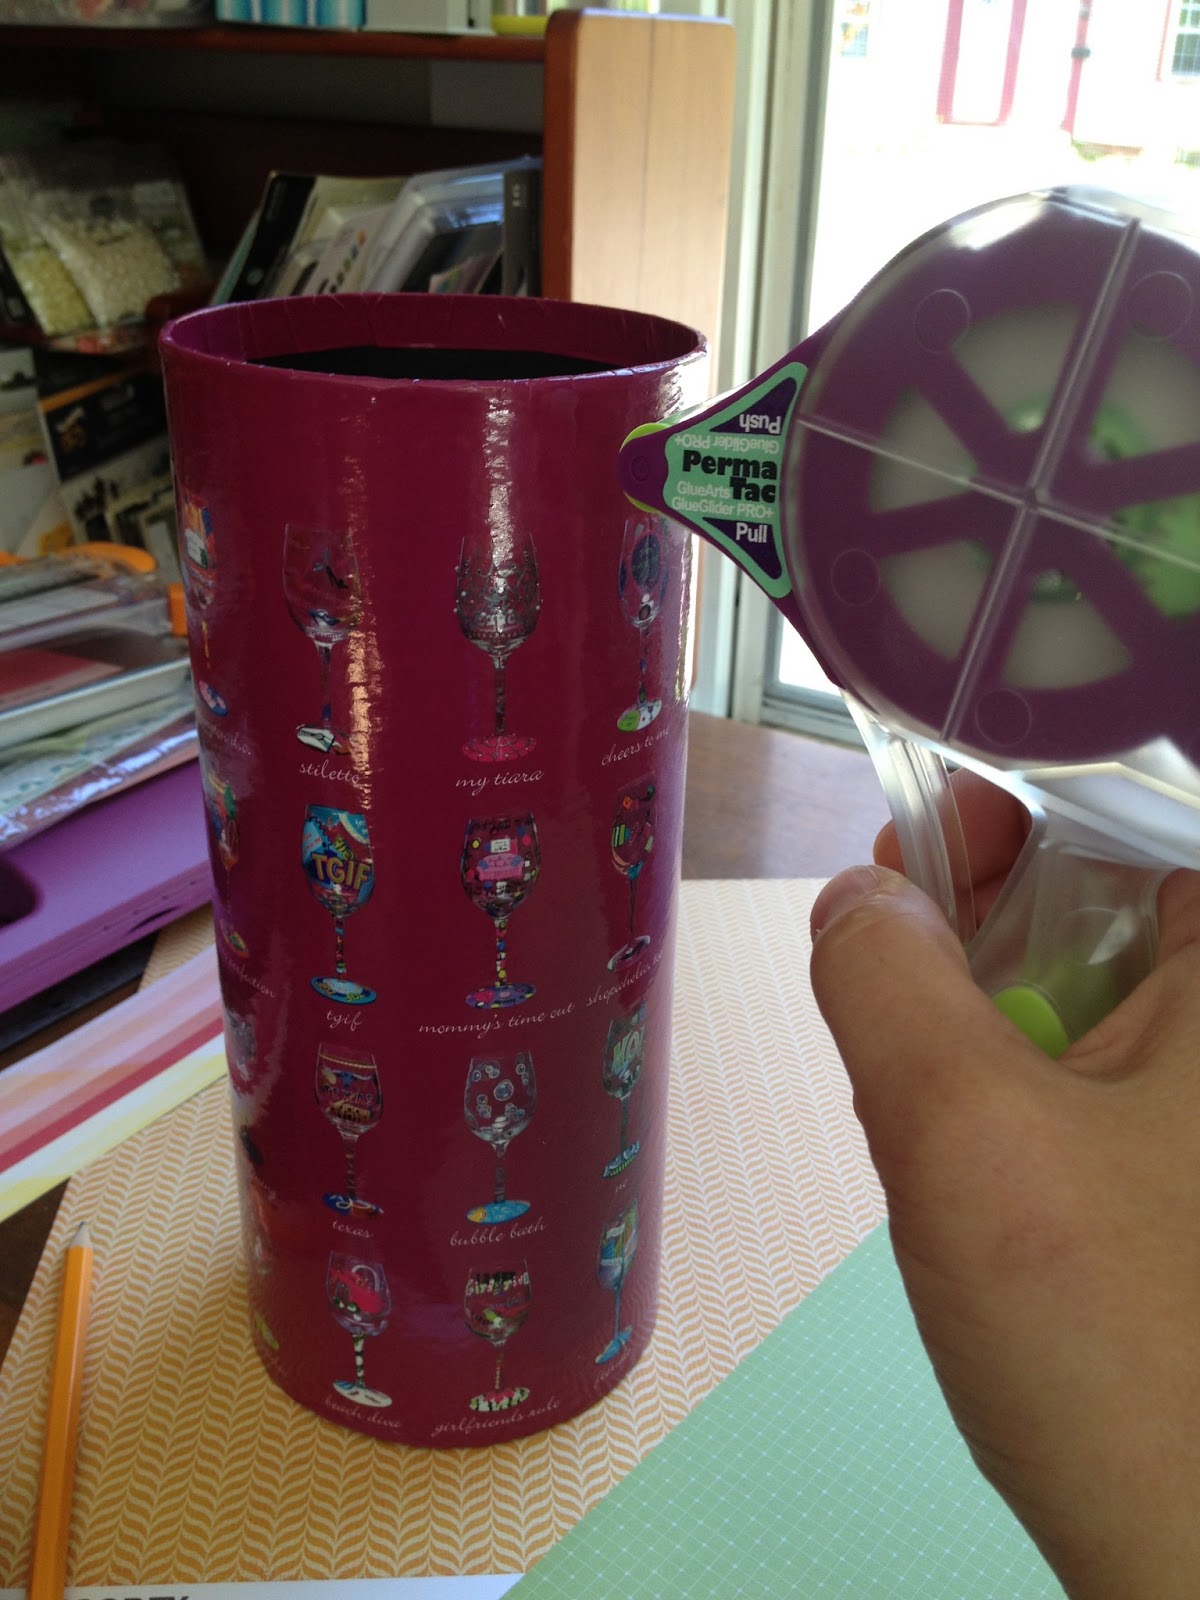
3. Apply adhesive to the box, I did one strip so that I could line up the paper before sticking it in place. One strip allows you to wrap it around and ensure the edges of the paper don't stray up or down, making it nice and straight. I used my Glue Glider Pro with the Perma Tac adhesive to ensure it stays put for a long time.
4. Add more strips of adhesive and glue the rest of the paper to the box.
5. Of course, a 12X12 isn't going to fit all the way around. I chose a coordinating sheet, and cut a piece to cover the exposed box.
6. Choose another coordinating sheet. This one is Basic Grey - Knee Highs & Bowties. Trace the lid, and make sure you do it on the opposite side of the paper you intend to use. Cut it out, and adhere it to the box.
7. Rather than place it on paper and draw a pencil mark, I decided to measure the lid depth with a measuring tape. This way, I could make an accurate cut. A pencil mark is always a little off, and this is a small strip (only an inch in this case) so the more precise, the cleaner it looks. Measure, cut, and adhere.
8. I cut a strip of paper and adhered it around, using the same paper that is on the top of the lid. The other side of the paper, around the lid rim, was cut and adhered in the center of that.
9. Now there's a gap here too, so I cut strips as I did before and tried to line up the patterns as best I could.
Now it looks like it goes all the way around!
10. Add a sentiment. I chose "Cheers" from the newly released
Camden Town - Male 2 EZ Mount Stamp Set and matted it on black cardstock.
11. Using the wine glass image from the same set, I colored it with my
Spectrum Noir pens (DR5, DR3, DR2.)
12. Add Ranger Glossy Accents to give the glass some shine. Stray Glossy Accents can be cleaned up with a needle or other sharp, fine point.
13. Adhere image next to sentiment with
adhesive squares.
14. Color acrylic flowers in with
Spectrum Noir pens. I had a total of 6 I wanted to use, one for each color of the rainbow (in keeping with the rainbow palette I had going on.) Color the top, and then the underside to assure it is rich in color. I used DR3, OR3, CT4, LG5, BT8, and PL5.
15. Choose a strip of lace (the thicker the strip, the bigger the flower) and thread.
16. Sew as you would any ribbon flower, threading the needle through the lace and then pulling tight to create the flower. Assure that it is exactly as you'd like before you remove the needle.
17. After tying the ends together, turn upside down and apply a ring of adhesive (I used Helmar 450) and scrunch it up. Hold it until the glue dries, and wrap washi tape around the base to make it look a little cleaner. You will use this base to adhere it to the lid of the box.
It ends up looking something like this.
18. Apply another ring of glue to the lid and attach the flower to the top of the lid. Hold in place until it dries completely. I also added the same washi tape around the rim of the box lid.
Here's what you end up with:
19. Add acrylic flowers to the top. As these flowers came attached to wires, I ended up just sticking the wires through the center of the lace flower after twisting them together.
20. To lift the lace flower up even more, add glue in a circle around the outside of the acrylic flowers, wherever you think the flower should furl upwards.
21. Squish it together and hold it until the glue dries completely, kind of like what you did in step 17. It lifts the whole thing up, allowing you to see the base a little better, and making it look more like a flower. You could sew it, but I wanted it to appear as if it did it all on its own :) Just make sure you use a good, strong adhesive.
The finished product! I can't wait to give this to someone, fancy wine glass inside :)
Head over to the
Crafter's Companion store to pick up stamps from the
Camden Town line and make your own gift box! With so many different images, you can choose the perfect one to compliment your gift (like the cupcake image! Yum!)
Have a great day, and stay tuned for some sneak peeks of an upcoming
Crafter's Companion release! You won't want to miss it :)
xoxo
Khristen


No comments:
Post a Comment